Large Panniers for CETMA Front Rack
March 20th, 2012
I made these panniers because it didn’t seem like there was any product out there that would work well with the CETMA 3-rail Half Rack. Most rear panniers hang over the deck of the rack, and so you lose that use: I didn’t want to compromise. Front panniers have a very different mounting system, generally.
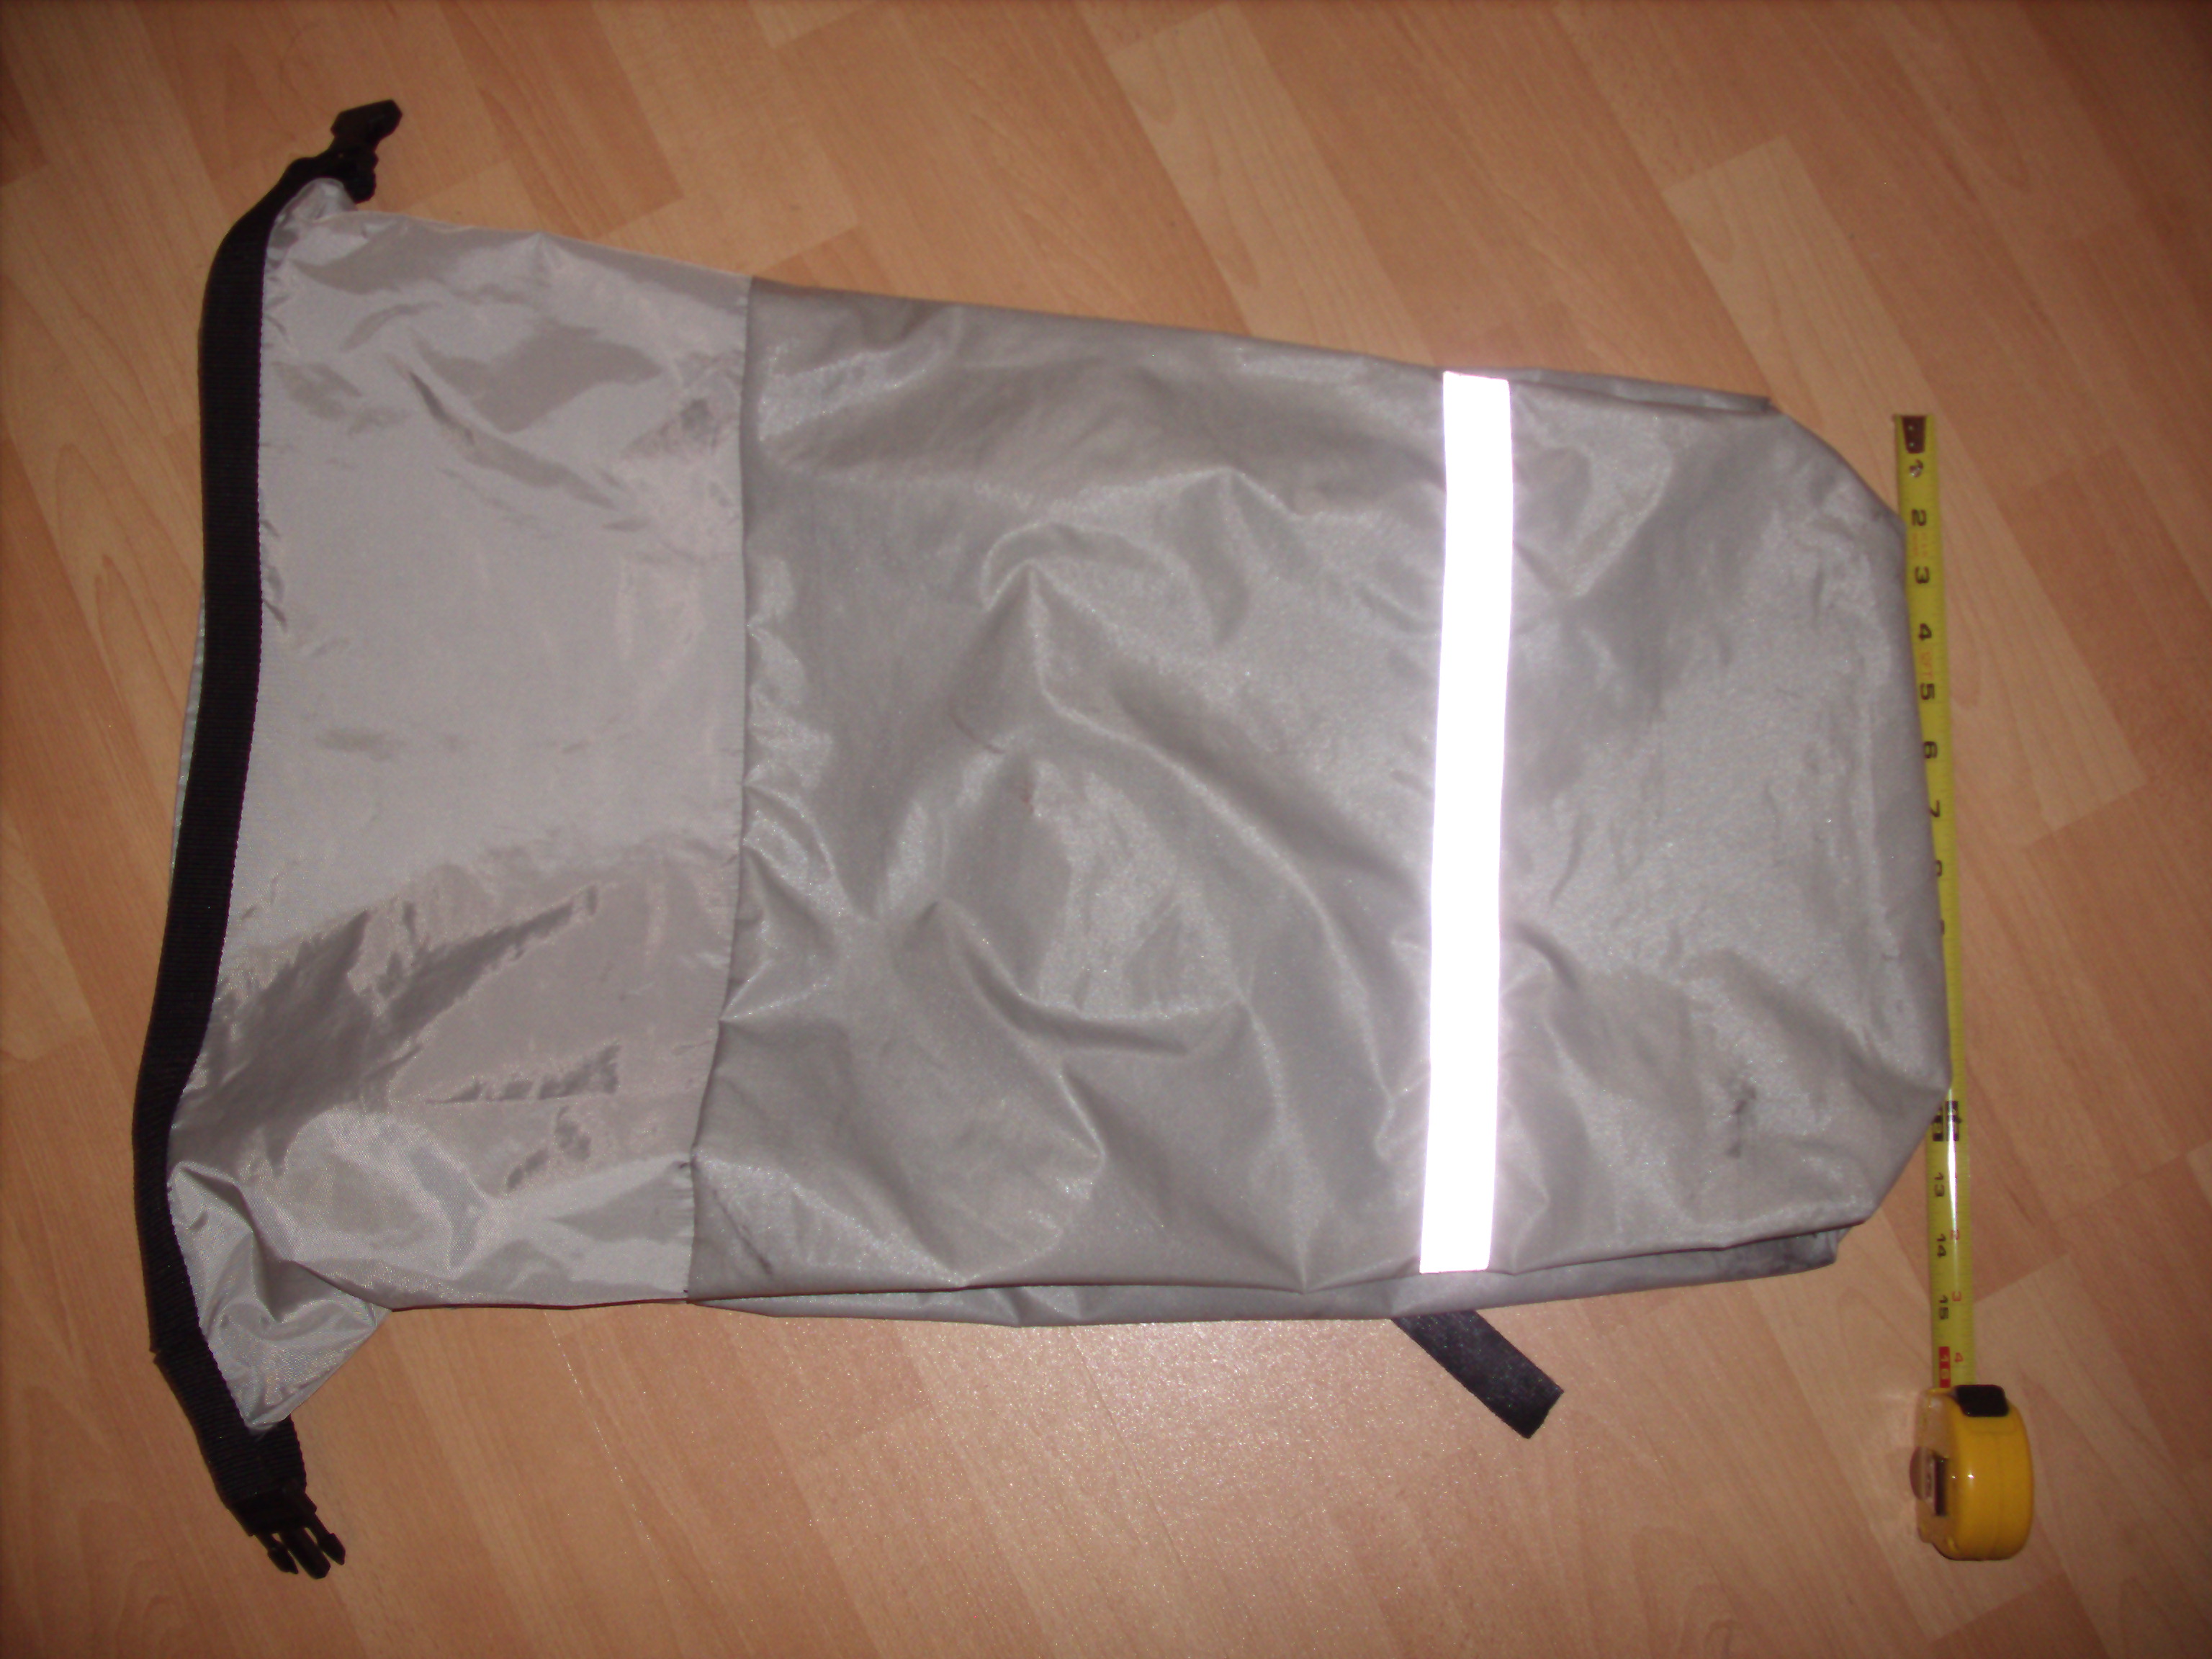
The Finished Product
Here’s what the panniers I made look like on and off the bike.
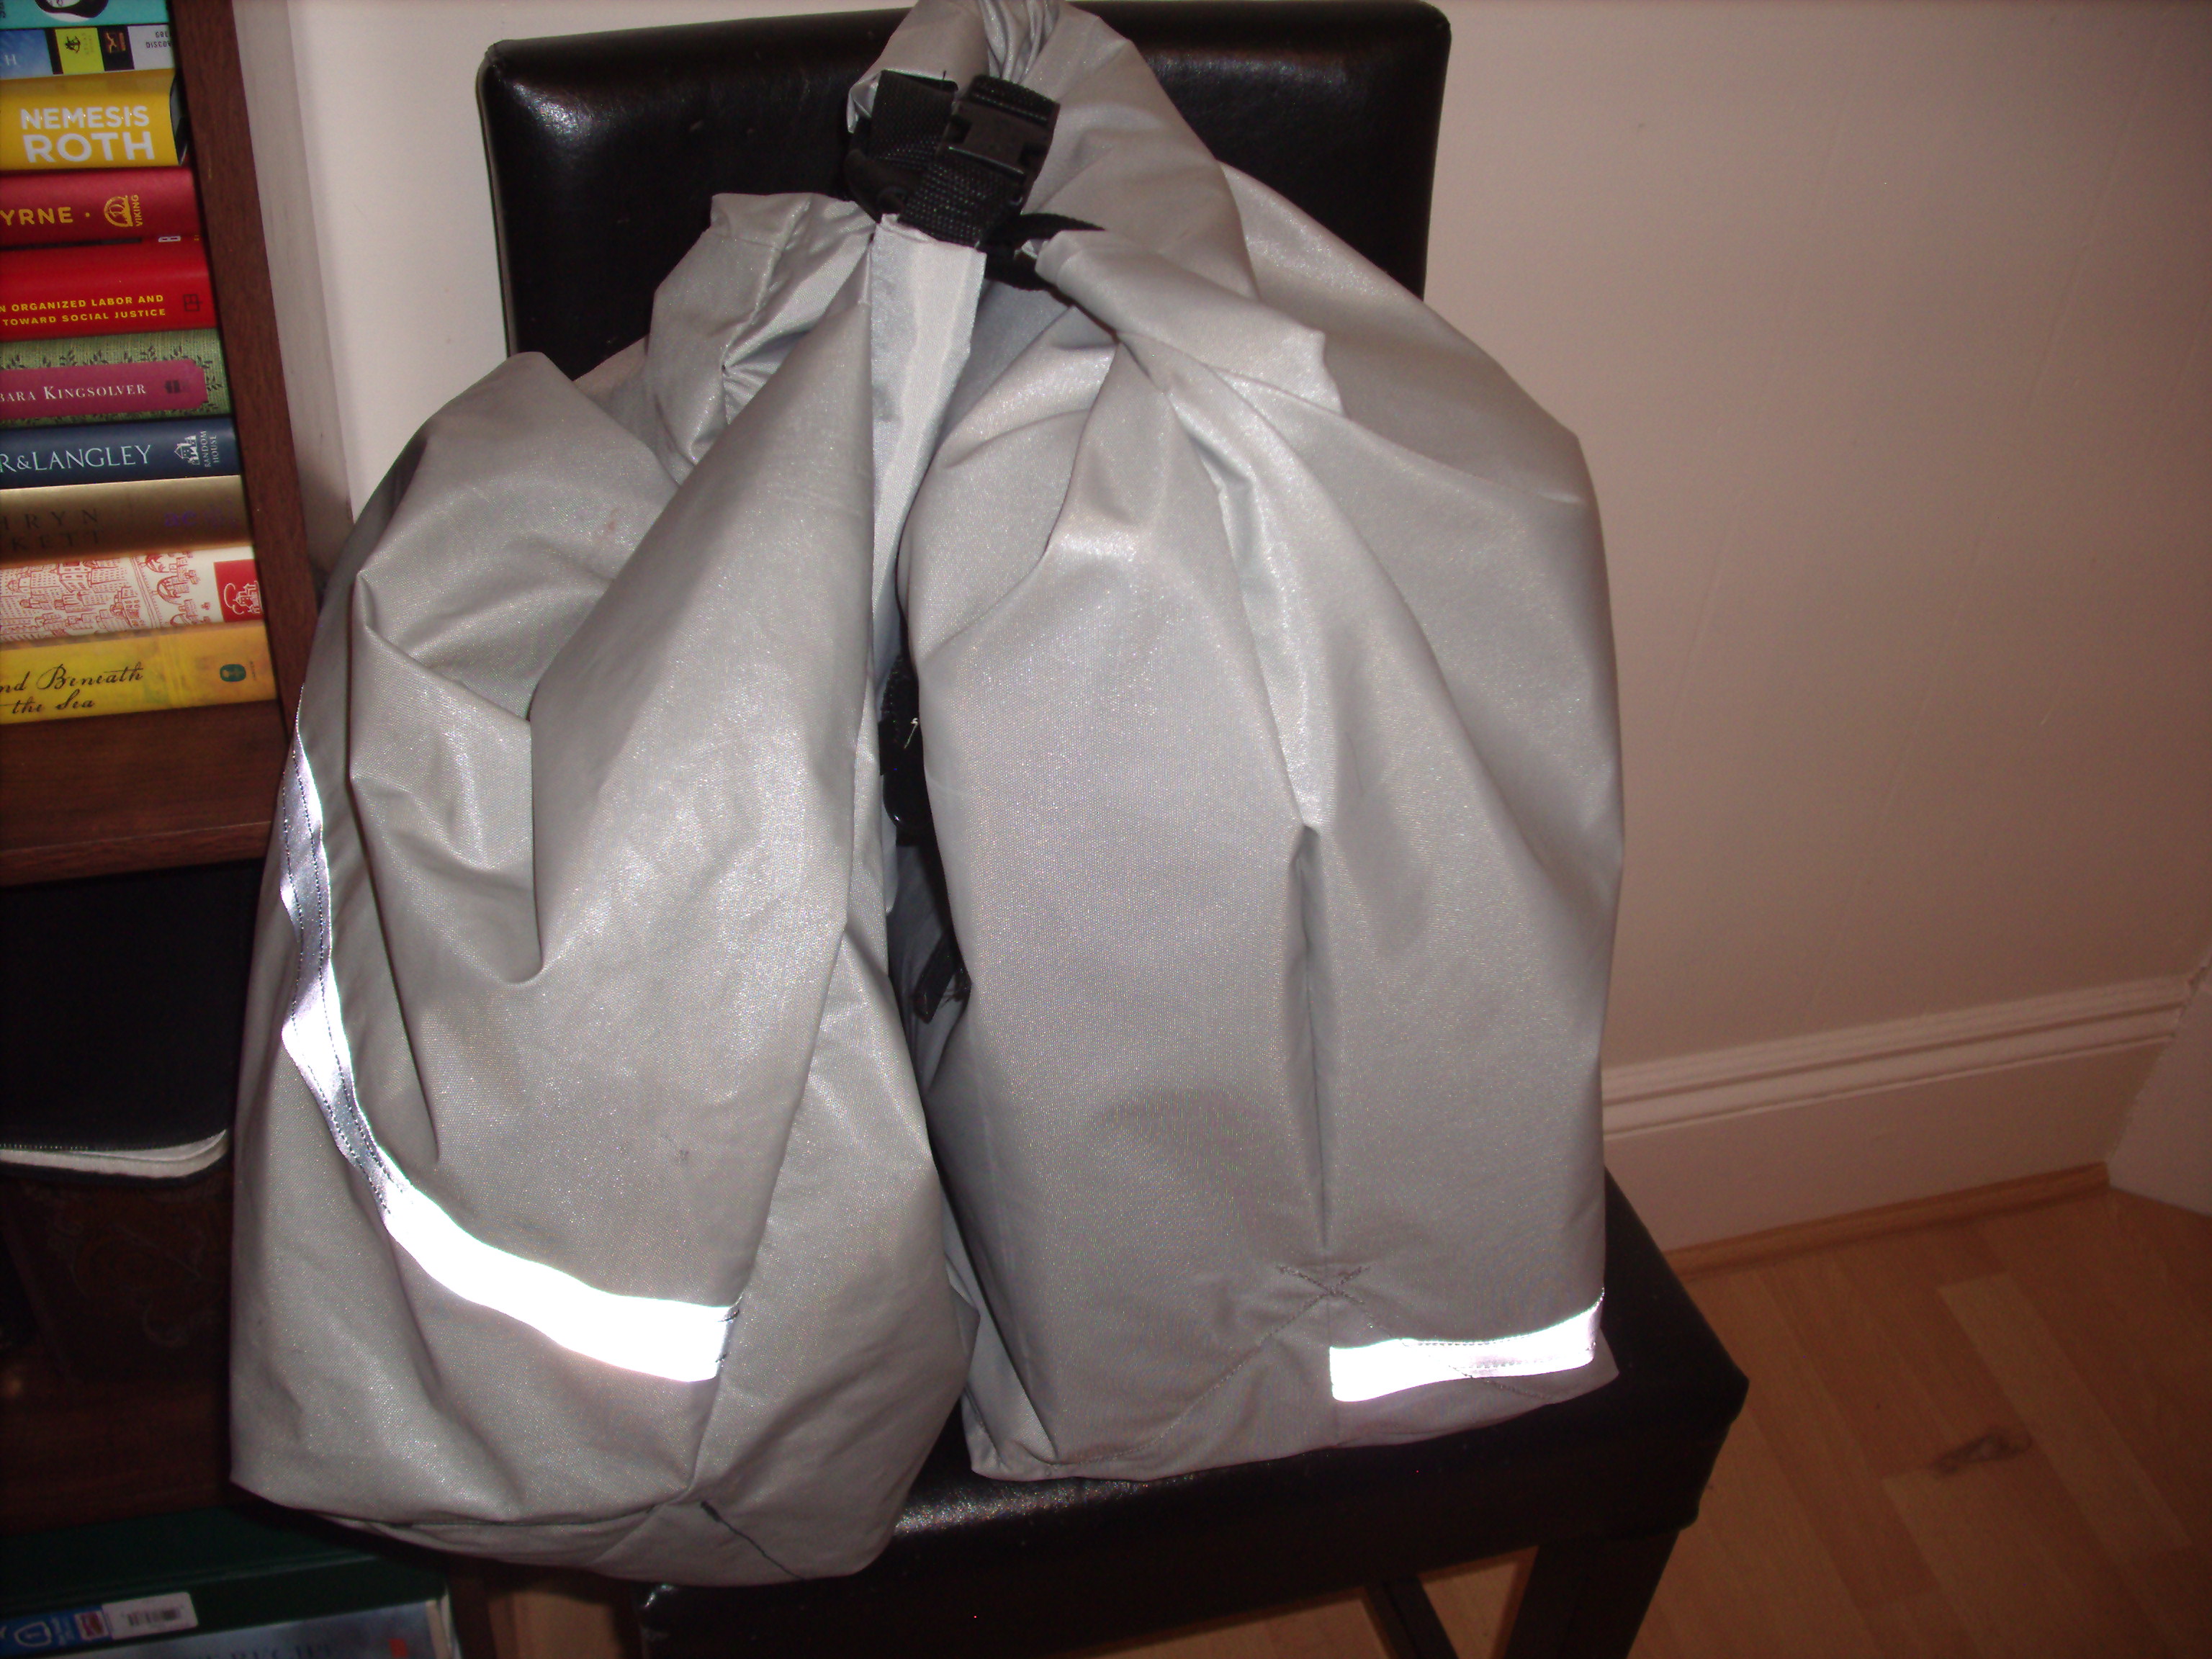
Off the bike

One pannier, on the bike (and some of the groceries I carried in it)
They’re very large: the total height is about 30 inches, or about 20 inches when rolled totally shut. The cross section is 8.5″ x 8.5″. That puts the volume around 1400 cubic inches when closed or 2200 cubic inches if you don’t roll down the top. I use the gutter clips to reach up to the rack and bear a lot of the weight: they have a habit of jumping off when the pack is unloaded. I since since cut four 5″ velcro loops to keep them from hopping off.
There is an inside pocket which holds a piece of cardboard to help keep the corners out of the wheel spokes. I was pretty coarse with my measurement of both the pocket and the cardboard, but it does a passable job. Cardboard has a bad habit of bending and being useless for this purpose, though. I’m looking for some rigid plastic to serve that purpose.
Materials
Following are the materials I used for a single bag
I ordered all my materials through Seattle Fabrics. I used 420D waterproof packcloth (Nylon). I could easily see one using a heavier material for stiffness, such as the 500D Cordura.
I also use their Nylon 1″ webbing, 3M Scotchlite Reflective Tape (1″), ONE-WRAP velcro (1″), one side-release buckle (1″), two gutter hooks (5/8″ wide for 1″ webbing), and DB92 Polypro thread (1 spool in black and 1 in gray).
Fabric: 60″ x 25″ (bag), 28″ x 15″ (pocket)
Webbing: one piece of 50″, two pieces of 12″ each
reflective tape: one piece of 25″
Two-sided Velcro: two pieces of 3″ (for the Cetma rack struts), two pieces of 6 3/4″ (for the fork – I measured this to fit my fork exactly, so you should do the same), two pieces of 5″ to hold the gutter hooks on the rack rails
Design
Here’s the master document I came up with the design. Below are all the measurements I used.

I put all the measurements on the drawing, which was ultimately very cramped. Click through to get the large size. I've provided all the measurements you need to know below - let me know if I need more detail!
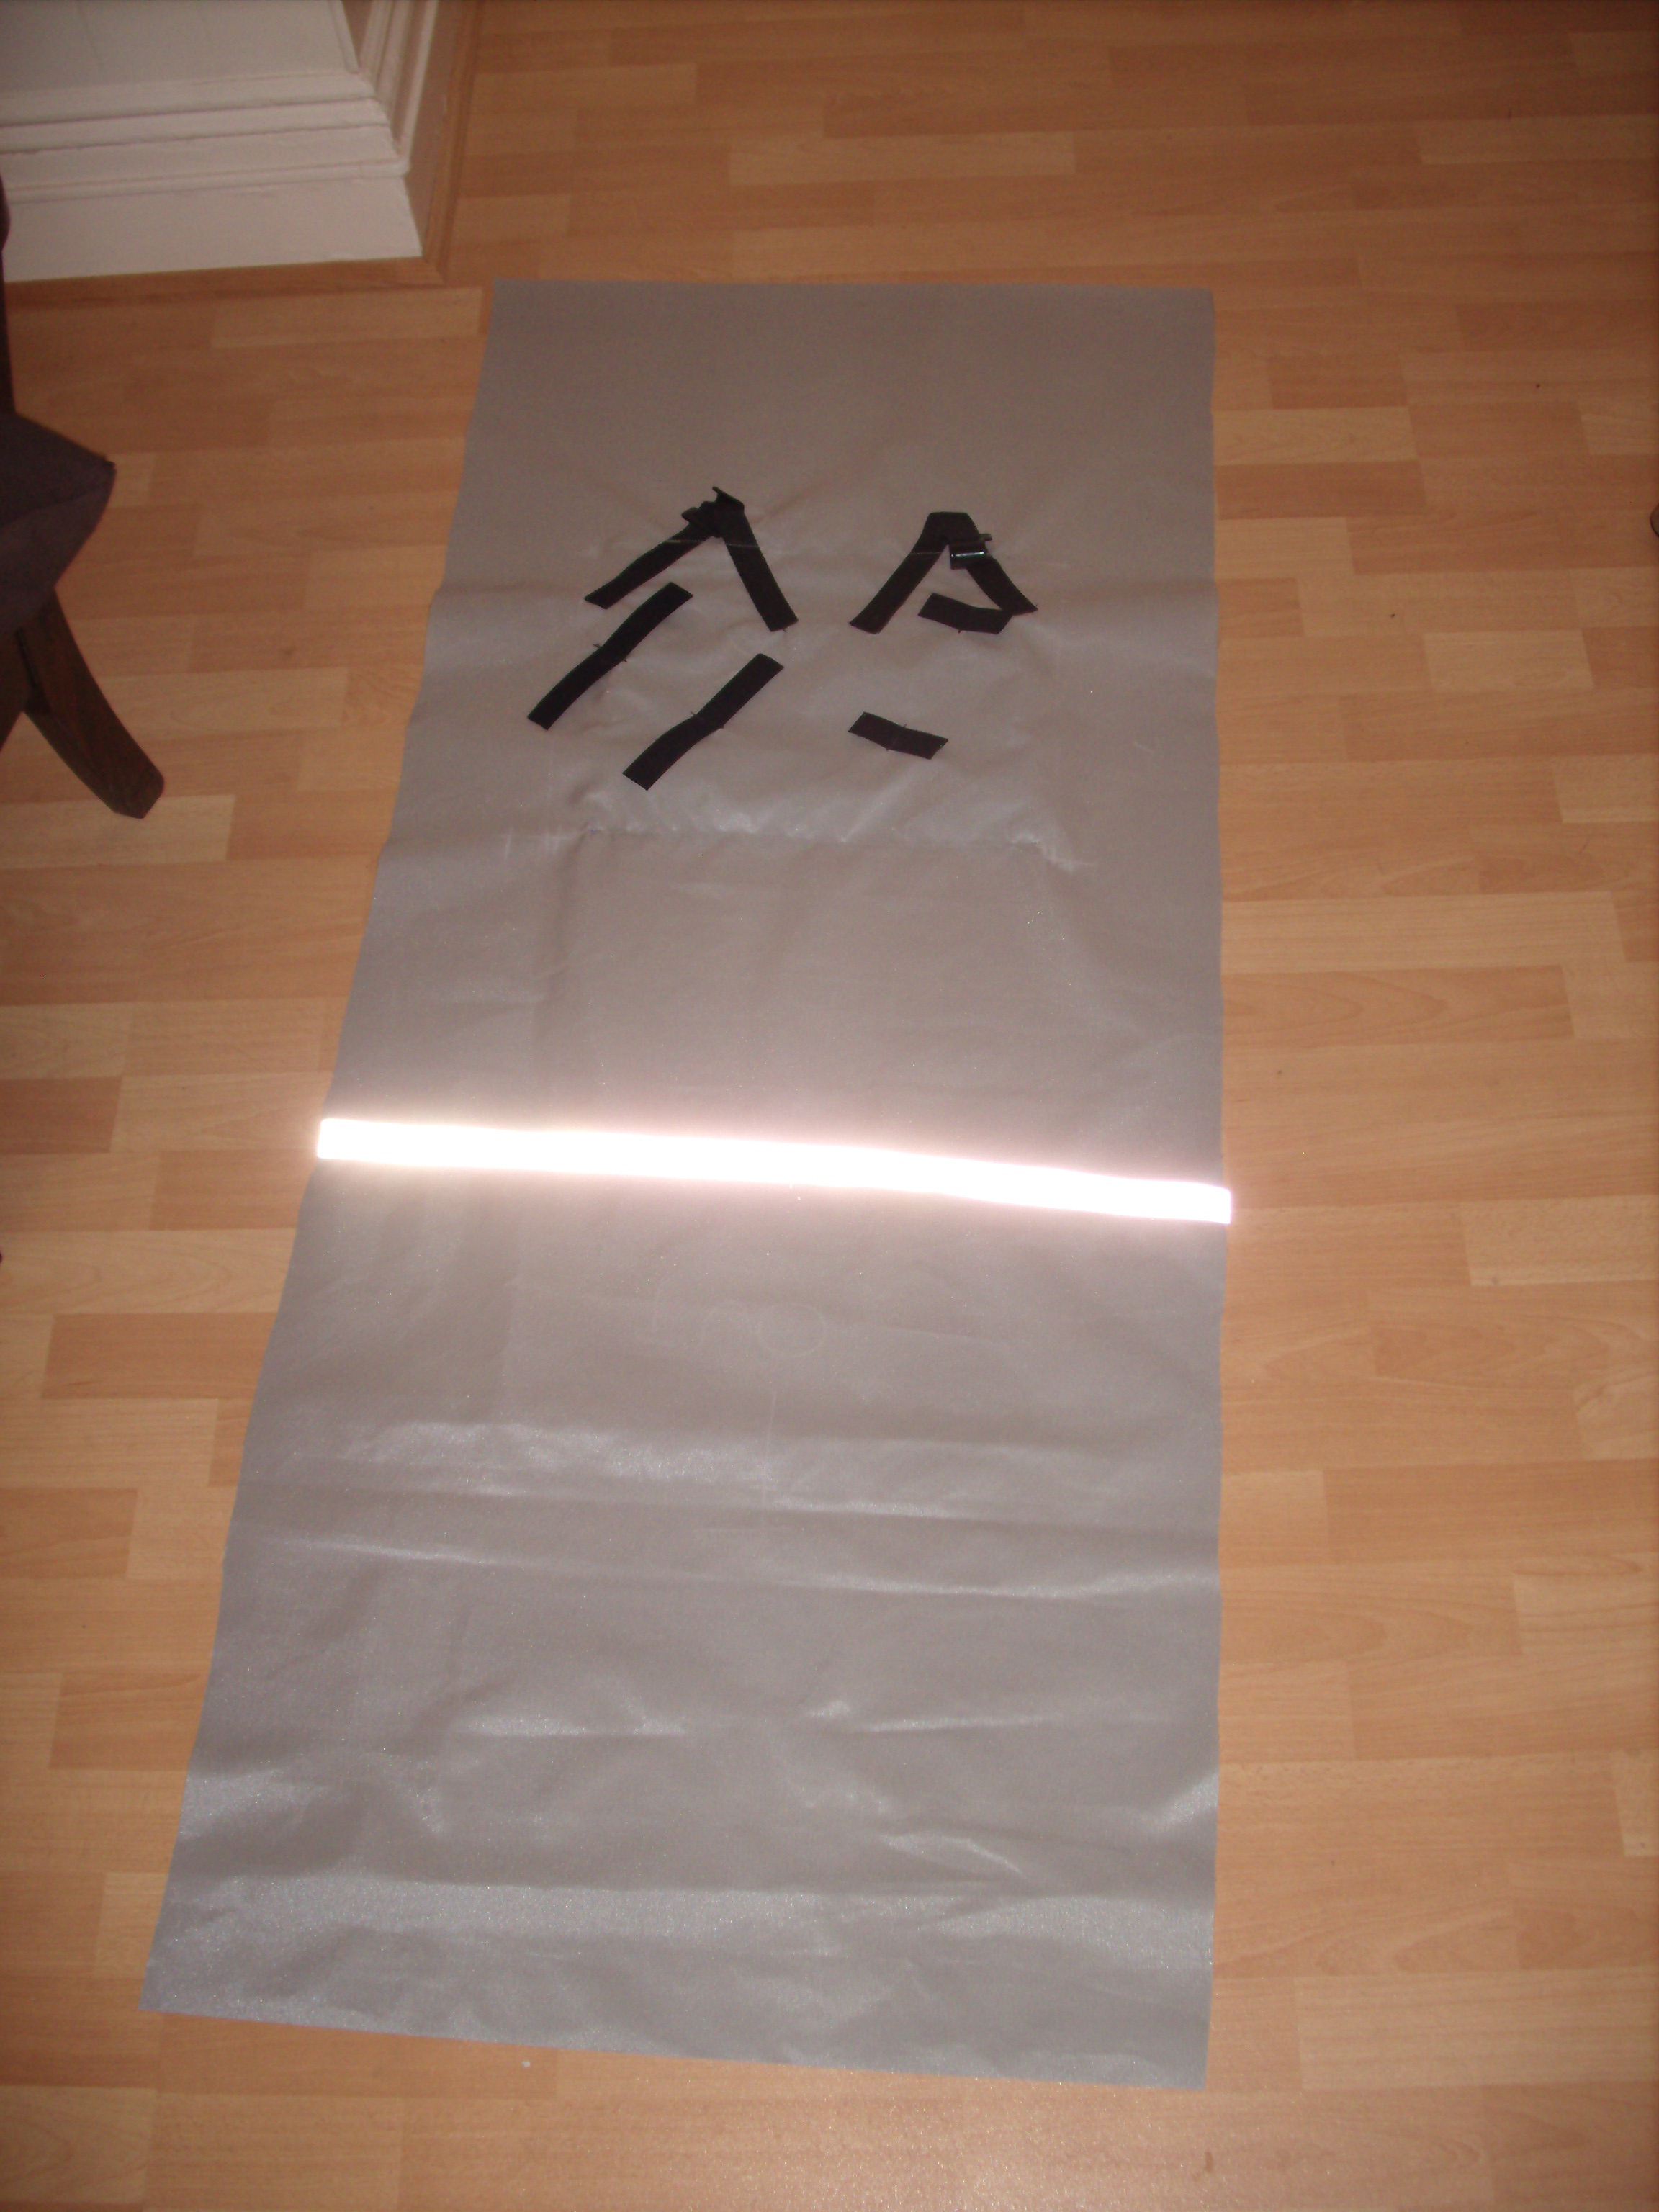
The original bag I made (there’s some experimentation here, so ignore the sewn-in extra panel).
This is the front side of the bag, with the bottom folded under.

This is the original bag with the bottom folded under.
Steps
1. Cut out all of the required pieces of material. Fold the large piece in half width-wise and measure out the following.
2. On the “outside” for the reflective strip, mark parallel to the fold a line 10.25″ from the fold on what will be the front panel of the bag.
3. On the outside, back side of the bag, sketch out the “back panel” which will be 12″ tall and 15″ wide, and offset from the fabric edge by 5″ and from the fold by 4.25″. This is on the opposite face from the reflective strip. For the following instructions, we will refer to measurements to the left and down from the “bottom front” corner of the back panel, i.e. if the reflective strip is on the top of the bag-to-be, this is the upper-right corner of the back panel you just sketched.
4. For the “front” (Cetma rail) velcro straps, mark points at 5.25″ left and 3.75″ down and at 2 5/8″ left and 9 3/8″ down and connect them by a line. The outside edge of the short velcro straps will fall on the 1st inch along this line from either end.
5. For the “back” (fork) velcro straps, mark points at11 3/8″ left and 4.5″ down and at 14 3/4″ left and 7 3/4″ down and connect them by a line. The outside edge of the long velcro straps will fall on the 1st inch along this line from either end.
6. The gutter hook straps will be slightly different lengths if you have the CETMA “light mounts” on. The gutter hooks will be centered at 11″ and 3 3/4″ left from the corner of the panel, and 1.5″ up from the top edge of the panel if you don’t have a light mount, or 1.25″ above the top of the”back panel” for the “back” hook and 1.5″ for the “front” hook. Mark those points.
7. Place the gutter hooks in the straps as they will be used, and indicate the location of the straps.
8. Sew along your lines first doing the reflective strip, then the velcro straps (the straps should be perfectly perpendicular to the lines you marked, and sewn exactly in the middle), then the straps for the gutter hooks (with the hooks in there!).
The bag with all the strips and straps sewn in, but not yet turned into bag shape.
9. Sew the pocket edged together to make it 15″ wide and so that the back overhangs and has a total height of 13″
10. Turn the pocket inside out and against the “back panel” on the other side (inside of the bag) from where you have been working thus far. Sew the bottom edge 4.25″ from the fold, and the top edge 12.25″ above that.
11. Sew the bag together inside out.
12. From the bottom corners on each side, mark 4.25″ up and over (four markings). Draw a line parallel to the fold to the edge from each of these markings.
13. Pinch the markings on opposite faces of the bag and pull them apart to make the base rectangular. The lines drawn in step 12 should now be joined. Make a stitch along each of those two lines.
14. Sew the triangles you created in step 13 up onto the side face.
15. Turn the bag inside out. At this point, you need to only do the top hem: pin the hem using binder clips. Then pin the webbing over it, with the lobster clips sewn into a 1.5″ loose flap at the bag seams.
16. Make 4 seams to sew the webbing.
You’re done! Once the bag is mounted on the rack, you can slip the two 5″ velcro straps around the gutter clips to keep the clips from popping off on bumps. (More of a problem when the bags are empty.)
I also cut a 12″ x 15″ piece of cardboard behind the pocket (I made it out of the UPS box!) but it has gotten uselessly crumpled once I loaded the bags. Delicate folding does on OK job of keeping the bag out of the spokes, but I’m on the hunt for a better backing.

Leave a Reply